Coding An Atom Feed Optimized For Feedly


It’s Not Hard, But There Are A Few Hoops To Jump Through
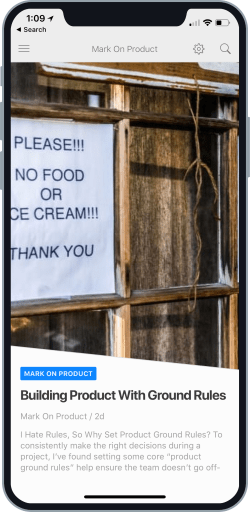
As I built this site, I wanted an Atom or RSS feed optimized for Feedly. Feedly is an incredibly popular content aggregator and it made sense to optimize for it. I didn’t want to spend a lot of time or effort, but in a few minutes, I covered the basics - giving me some nice customizations.
Creating a feed seems like an easy enough task right? Well, in theory it’s simple, but like anything worth doing in practice it can be a challenge. Before we jump into code, if you’re trying to decide between Atom or RSS - either can work fine. I opted to go with Atom because the standard newer, more robust, and specifically designed to do what I’m looking for.
Before you begin, here are a few tips:
1. Name Your File Correctly
You can name the XML file whatever you like. However, I’d suggest sticking with either rss.xml, atom.xml, or feed.xml. This is because most aggregators are set to look for your feed automatically by searching for an XML file matching these terms. The Atom feed for this site.
2. Validate Your XML
Your feed should be valid. In other words, use a tool to check the syntax. It’s to easy to make a small mistake that breaks the entire feed. I found it useful to help troubleshoot small mistakes. W3 Validator.
3. Check Out What Feedly Has To Say
Feedly offers several tips in this post on their blog. I used the most critical ones for this feed. There are a few other tips they suggest that you might find useful. Tips from Feedly on optimizing your feed.
4. Grab My Feed File From GitHub
The code below is from the feed I created for this site. However, if you’re reading this months or years after I posted that code, something might have changed. For the latest version of the file grap it off GitHub.
If You’re In A Hurry This Is The Complete Feed XML:
<?xml version="1.0" encoding="utf-8"?>
<feed xmlns="http://www.w3.org/2005/Atom" xmlns:webfeeds="http://webfeeds.org/rss/1.0">

<title>Mark On Product</title>
<link href="https://markonproduct.com/feed.xml" rel="self"/>
<link href="https://markonproduct.com/"/>
<updated>2018-08-26T15:56:49-04:00</updated>
<id>https://markonproduct.com/</id>
<author>
  <name>Mark Mitchell</name>
</author>

<webfeeds:cover image="path/to/image.jpg" />
<webfeeds:icon>path/to/image.png</webfeeds:icon>
<webfeeds:logo>path/to/logo-30px-height.svg</webfeeds:logo>
<webfeeds:accentColor>67a43e</webfeeds:accentColor>
<webfeeds:related layout="card" target="browser"/>


  <entry>
   <title>Sample Post Tile</title>
   <link href="https://markonproduct.com/sample-post-title"/>
   <updated>2018-08-23T06:16:00-04:00</updated>
   <id>https://markonproduct.com/sample-post-title</id>
   <content type="html">
     <!--Post content goes here, be sure to XML escape the content-->
   </content>
  </entry>

</feed>
Let’s Break It Down:
Version, Encoding, And Webfeeds Namespace
This fairly typical and there’s nothing tricky here. The only thing out of the ordinary is xmlns:webfeeds="http://webfeeds.org/rss/1.0" that’s adding the webfeeds to the namespace of the document so when we use it later the file will expect it. This allows the file to have custom elements and still validate.
<?xml version="1.0" encoding="utf-8"?>
<feed xmlns="http://www.w3.org/2005/Atom" xmlns:webfeeds="http://webfeeds.org/rss/1.0">
Site And Author Info
All the items you’d expect to find. Just be sure your date is displayed in XML date format.
<title>Mark On Product</title>
<link href="https://markonproduct.com/feed.xml" rel="self"/>
<link href="https://markonproduct.com/"/>
<updated>2018-08-26T15:56:49-04:00</updated>
<id>https://markonproduct.com/</id>
<author>
  <name>Mark Mitchell</name>
</author>
The Webfeeds Items For Feedly
This is where the the Feedly optimizations come in. I have’nt had success with the cover photo or finding any reliable information on it’s dimensions or where it is displayed. However, I’ve had success with the 96px icon and the 30px logo. The accent color is a Hex color to set the color of of hyperlinks in your posts. The related layout sets the layout style for related posts.
<webfeeds:cover image="path/to/image.jpg" />
<webfeeds:icon>path/to/icon-96x96.png</webfeeds:icon>
<webfeeds:logo>path/to/logo-30px-height.svg</webfeeds:logo>
<webfeeds:accentColor>67a43e</webfeeds:accentColor>
<webfeeds:related layout="card" target="browser"/>
The Post And It’s Metadata
This is the meat of the post information. It’s farily self-explanitory, the only item I’d call out is that the post content itself nneds to XML escaped.
  <entry>
   <title>Sample Post Tile</title>
   <link href="https://markonproduct.com/sample-post-title"/>
   <updated>2018-08-23T06:16:00-04:00</updated>
   <id>https://markonproduct.com/sample-post-title</id>
   <content type="html">
     <!--Post content goes here, be sure to XML escape the content-->
   </content>
  </entry>
If You’re Using Jekyll, Here’s The Example With Liquid Tags:
Mark On Product is built using Jekyll, below is the exact template I use for the feed.
---
layout: nil
---

<?xml version="1.0" encoding="utf-8"?>
<feed xmlns="http://www.w3.org/2005/Atom" xmlns:webfeeds="http://webfeeds.org/rss/1.0">

<title>{{ site.title }}</title>
<link href="{{ site.url }}/feed.xml" rel="self"/>
<link href="{{ site.url }}/"/>
<updated>{{ site.time | date_to_xmlschema }}</updated>
<id>{{ site.url }}/</id>
<author>
  <name>{{ site.author.name }}</name>
</author>

<webfeeds:cover image="path/to/image.jpg" />
<webfeeds:icon>path/to/image.png</webfeeds:icon>
<webfeeds:logo>path/to/logo-30px-height.svg</webfeeds:logo>
<webfeeds:accentColor>67a43e</webfeeds:accentColor>
<webfeeds:related layout="card" target="browser"/>

{% for post in site.posts %}
  <entry>
   <title>{{ post.title }}</title>
   <link href="{{ site.url }}{{ post.url }}"/>
   <updated>{{ post.date | date_to_xmlschema }}</updated>
   <id>{{ site.url }}{{ post.id }}</id>
   <content type="html">
   {{ post.content | xml_escape }}
   </content>
  </entry>
 {% endfor %}

</feed>

